Copyright © 2000 David Gould. All Rights Reserved.
| Description: |
Shockwave Flash tutorial using Illustrate! 5.0 |
||||||||||||
| Level: | Intermediate | ||||||||||||
| Time to complete: | 15 mins(approx) | ||||||||||||
| Topics Covered: |
|
||||||||||||
| Materials: |
|
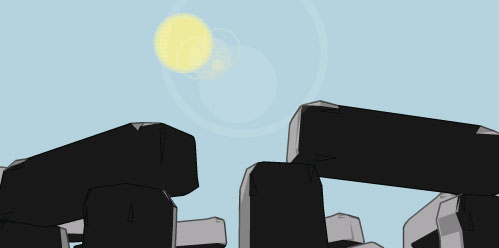
Sun Path Final Animation
click on the image to view the final animation
Load the scene SunPath_Tutorial.max.
Click on the Play button ![]() to view the animation.
to view the animation.
The scene consists of the sun moving across the sky from dawn to dusk, while
the dolmens rotate slowly.
Got to frame 40 then click on the Render
button ![]() .
.
You can see how the different objects have been assigned materials. The
sun and the flare have a semi-transparent material while the dolmens have
a sub-object material. You can open the Material Editor to look at the materials
in more detail.
We will now output this animation to Flash but before we do we need to change the frame rate that better reflects how Flash animations are played. In Shockwave Flash every frame of the animation is drawn in real-time, i.e. each frame consists of a series of shapes that have to be calculated and drawn. While 30 frames per second(fps) is the standard for video it isn't well suited for Flash. Not many machines can play a Flash animation at 30 fps so we must reduce the frame rate to ensure smoother playback.
Click on the Time Configuration button ![]() .
.
In the Frame Rate: section click on the Custom button, then set the rate to 15. Click on OK.
The animation now measures 50 frames. It is important to adjust the frame rate when outputting to Flash. Rates of between 10 and 15 are suited to Flash. Which rate you use depends on the complexity of the scene and/or the output file size.
Final rough draft rendering
Click on the Illustrate! menu item ![]() in the main menu bar.
in the main menu bar.
The Rendering Wizard is then displayed. Click on the Shockwave Flash (SWF) radio button, then click Next.
Leave the default setting of Draft Renderer then click on Next.
Click on the MAX Environment Color radio button, then click Next.
Click on the Cartoon image to change the drawing style. Click on Outlines. Click on Next.
Leave the default output settings then click on Next.
Click on Finish to save your settings. The Illustrate! window is then displayed.
Click on the Render button ![]() .
.
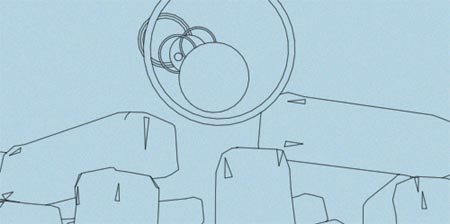
In the virtual frame buffer the scene is displayed with only the outlines.
Take a look at the resulting Flash animation. It shows this single frame
with the scene rendered with only its outlines.
Let's now create a rough draft rendering of the first half
of the animation. Click on the Render Scene button ![]() .
.
In the Time Output: section set the Range: start to 0 and the end to 25.
Click on Render.
Take a look at the Flash animation and you'll see the scene rendered with
its outlines. The background color changes as the sun moves across the sky.
The lens flare appears towards the end.
We will now create a custom style for the sun and the lens flare.
If the Illustrate! window isn't already open click on the
Illustrate! menu item ![]() .
.
Click on the Create New button ![]()
In the style's name box type in the text "Surface
Only" ![]()
Open the Surface Only style by clicking on the +
button displayed to the left of its name. ![]()
Click on the green tick ![]() next to the Edges
item to turn all the edges off.
next to the Edges
item to turn all the edges off. 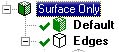
Click on the surface ![]() Default.
Default.
In the Surface: combo box select the predefined surface Flat.
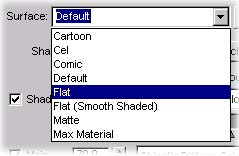
The style we have created will render the surface of an object with its
flat diffuse color and the edges won't be drawn.
In the Named Selection Sets, located in the 3DS MAX main toolbar,
select sun and flare to select them. 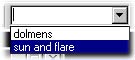
In the Illustrate! window ensure that the Surface
Only style is selected. ![]()
Click on the Assign Style to Selection button
![]() .
.
In the 3DS MAX main toolbar set the Render Type to Selected
so that we only render the sun and flare. 
Click on the Render button ![]() .
.
Take a look at the resulting Flash animation and you'll see the sun and
the resulting lens flare rendered with the style we just assigned. You'll
also notice that the objects' opacity is output as well making the lens
flare and sun's corona semi-transparent.
We will now create another style for the dolmens. Illustrate! currently only supports flat shading of objects so to simulate shading the dolmens have been assigned a sub-object material with three different shades of gray. I then assigned each gray level material id to individual faces. To simulate the changes in light I then animated the three gray colors so they would change with the sun rising and settings. Open the Material Editor then take a closer look at the stone material to see how this was done.
If the Illustrate! window isn't already open click on the
Illustrate! menu item ![]() .
.
With a style selected click on the Create New
button ![]()
In the style's name box type in the text "Dolmen".
![]()
Open the Dolmen style by click on the + button
displayed to the left of its name. ![]()
Click on the surface ![]() Default.
In the Surface: combo box select the predefined surface Flat.
Default.
In the Surface: combo box select the predefined surface Flat.
Click on the brush Edges | Fold | Visible |
![]() Default.
Default. 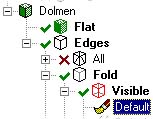
From the Brush: combox box list select 1.5 Pixel Circle.
![]()
Click on the paint Edges | Fold | Visible | ![]() Black.
Black. 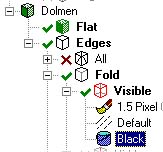
From the Paint: combo box list select Object's Diffuse
Darkened. 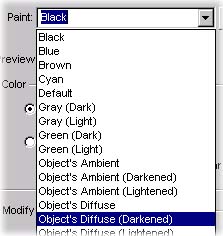
We have just set the style so that all fold edges will 1.5 pixels thick
and they will be drawn with the darkened diffuse color of the underlying
object. We will draw creaes with a slightly thinner brush.
Click on the brush Edges | Crease | Visible |
![]() Default.
Default. 
From the Brush: combox box list select 1 Pixel Circle.
![]()
For this scene we don't need to calculate the Surface of Intersection so
we can turn it off.
Click on the green tick ![]() next to the Surface
Intersection edge item to turn it off.
next to the Surface
Intersection edge item to turn it off. ![]()
In the Named Selection Sets, located in the 3DS MAX main toolbar,
select dolmens to select them. 
In the Illustrate! window ensure that the Dolmen
style is selected. ![]()
Click on the Assign Style to Selection button
![]() .
.
In the 3DS MAX main toolbar set the Render Type to Selected
so that we only render the dolmens.
Click on the Render button ![]() .
.
Take a look at the resulting Flash animation and you'll see the dolmens
surface color changes with the sun's rising. Their fold edges are drawn
with a darker version of their underlying diffuse color.
With all the styles assigned we can now render the final animation.
In the 3DS MAX main toolbar set the Render Type to View so that the entire scene is rendered.
Click on the Render Scene button ![]()
Set the Time Output: setting to Active Segment.
Click on the Render button.
The resulting Flash animation will show the scene with the styles we've
applied.